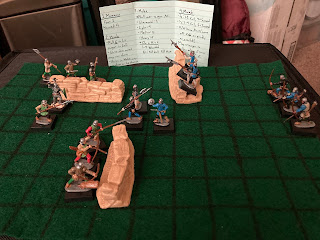
Today’s battle saw Baron Mordain meeting resistance in the fields outside Hopsburgh, in his ambitious efforts to unify the regions around Bleudingle and continue the legacy of the Reginaldian line.
Above: The Battlefield. Mordain and his soldiers on the left, Hopsburgh forces on the right.I utilized a new initiative system using a deck of cards. I’ve entertained the idea before but never tried any. This time, I made up my own.
1. Red represented one force, black the other
2. Even numbers mean infantry, odd mean archers, and aces/face cards mean heroes.
3. The number on the card also represents how many figures may be activated for movement on that turn. (i.e. a 3 means 3 archer figures may be activated, while an 8 means 8 infantry figures. For the purposes of my small game, it didn’t have too much of an effect.)
Mordain’s forces have a lucky streak and move quickly across the field to find shelter from enemy arrows among the ruins. The Hopsburghers advance their infantry. The lone Mordainian archer in the bottom left corner will soon be slain as the enemy claims first blood.
Combat! Mordain’s forces do not move much after their initial bout of speed, and the Hopsburghers seize the advantage, scaling a ruined walled and claiming the center field. Meanwhile, Mordain’s archers have secured a wall that will cover them while they loose upon the hapless Hopsburghers.
The Baron Mordain moves in, slaying two enemy infantry, while his archers shoot down one their rivals on the other side of the field—vengeance for their fallen brother at the start of the game! The remaining Hopsburgh infantry finish scaling the wall and emerge in front of Mordain’s infantry, ready to draw blood!
The Hopsburgh archers stick an arrow in a gap in Mordain’s armor, while their comrades are cut down in a bloody give and take in the center of the battleground.
Two more of Mordain’s men fall in a valiant resistance by the lone Hopsburgh infantryman, while the blue-clad archers are shot down by the Baron’s own. The last Hopsburgher finally breaks and tried to flee, only to be shot down before he can make it off the field!
I really enjoyed the diversity of using the deck of cards for initiative each turn. It probably could use some tweaking, but that’s ok. For solo play it definitely helped me to not feel as much like I was playing against myself. I’ve found a couple of figures and such that I forgot I had, and they’ll fit wonderfully with my games, so stay tuned to see those!


Looks a fun game. I will try your card method out when I have access to my figures…
ReplyDeleteIt worked out a lot better than I thought it might. I’m enjoying seeing your travels on the Duchy blog!
Delete